This page is a tutorial page on how to add an infobox into your page you just created. We will go step by step. so make sure you understand it. If its still unclear...please notify the founder and the founder will help you. we will be going through 5 Steps.
Finding The Infobox
Finding and infobox is easy. Well for the most part. To get started. You must create a New Page. the first step you do, is to go to your user page or the home page.
when you are on home page, you'll see a white box and a button that says Create a Page!
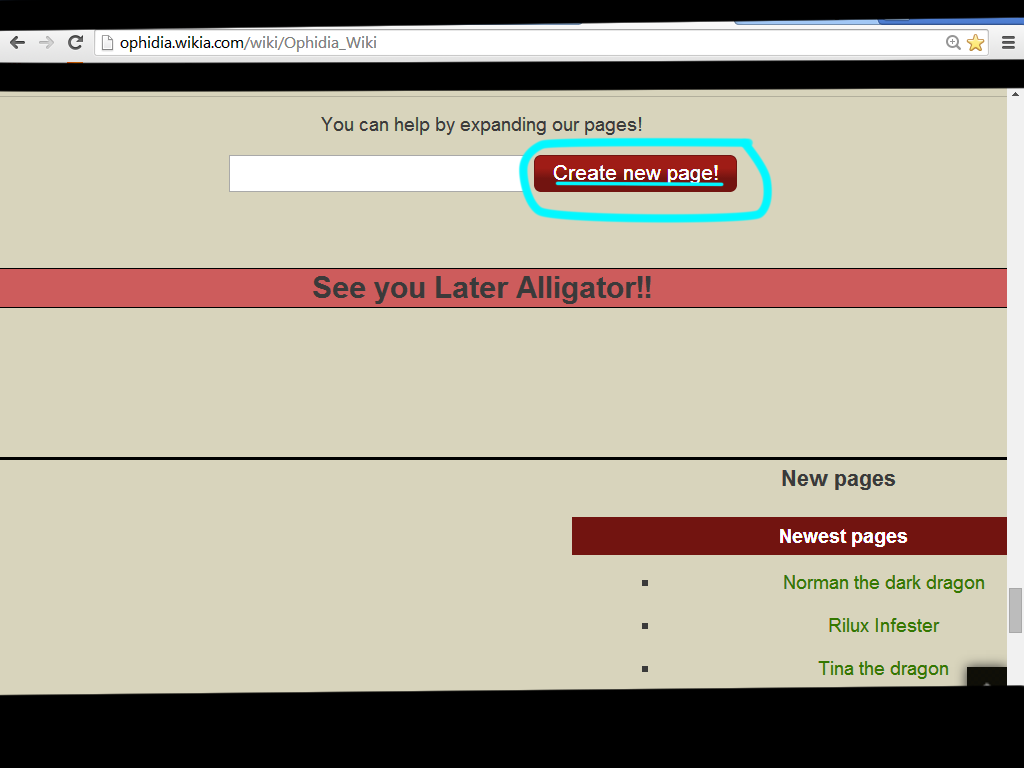

create a page button on homepage
- before you create a page, you have to place in your character's name.


contribute on main user page
on your user page you should see a special button called Contribute.
click it and scroll down to Add a Page


add a page
once you named the page and hit create a page or click add a page:
this will pop up asking you two choices on how you want your page to be.
Which are: Standard Page and Blank Page.


standard page and blank page
'''''Standard Page:
has your normal page set up with a video heading, picture heading, and two headlines that you fill in.
Blank Page:
Has nothing, and its completely blank with no default settings and you put in the headlines yourself.
(For this example i'm using the standard layout page)
now that you named your page (i'll use gunma for example)


page setup
you can start by adding things you want to your character's page. you can take off the two headings that are the picture and the video if you want too.
- now that's out of the way, you can start adding your infobox to make your character's page more cleaner!
Finding your Character's special Infobox
now that you got your page sections filled you can find the infobox you


template set up direction
need.
Keep in mind. this is a Special infobox that you must find.
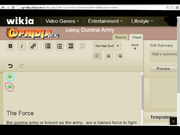
now that you scroll down you see a bolded word that says Templates.
you see your standard "puzzle pieces" there. however.. don't click any


search for a template (template editor)
of them!
once you click Add Other Templates this will pop up!
since were using gunma.
you click the Gunma Infobox
also add with it: Work in progress
(Tip! place the puzzle picees above the page, it will make things alot more easier to edit and fix.)
Once you click the two infobxes you want this will appear on your page:

infoboxes for gunma
(Tip! To make things eaiser to have different colors to make it less confusing. i highlighted the two.
Light blue is for the work in progress infobox and the one below it:
hot pink is your character's infobox
- important! it helps to have the work in progress infobox ontop and the character infobox below it. ( hit enter twice for character box)
- With ophidia its the same step.. but you have to type in Ophidia infobox. click it and hit preview and the box should be red.
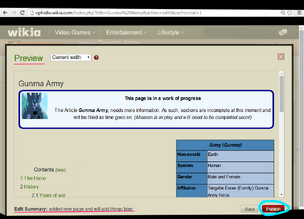
Filling out your character's Infobox
now that you got your two little "puzzle pieces"


character infobox preview
you have to click your character's box. to appears like this when you
place your mouse on it, as shown here:
'when that preview appears', click edit.
once you enter it, this window will pop up.


infobox set up
'''''now that is in you can fill out anyway you like. however these infoboxes have rules to place in each box. The image can be used if you have a picture to your character to make it smaller and fit within the box, go to your picture and look for the smallest size, click the size number and place it in image size and then erase everything, only the name the file stays.
- Your infobox must list these following sections into the title boxes:
- Homeworld, 'Speices, 'Age, 'Height, Weight, 'Occupation, Family Affiliation, Main Weapon, Current Residence, Armor, Team Members, Allies, Enemies
- note! some characters may be different, take a look at each character to see the difference.
Adding more to infobox sections
once you fill in the following sections titles you can start adding info to


preview of filled out infobox
them.
once you start to fill in your slots it should appear like this:
when you add a picture it should appear something like this:
With the picture inside infobox you can


preview of infobox with picture
change it anytime you like. just do the same method, shown in the picture preview. the blue highlighted parts shows on how to do it.
Adding Links to certain sections of your infobox
now onto the last step. Adding Links to your infobox sections.


source mode
now this step is different.
you go to what is called Source
if you click it: it should appear like this:
now that you have source mode on, it should be much easier to fill in the infobox's sections you want to add a link too.


adding links to infobox
Depending on what you want you click in "info" title is the one you highlight and click this button that is highlighted hot pink shown here:
once you picked the ones


with the links shown
you wanted to link it should appear something like this:
Those " [[ ]] " on the word that is chosen shows its been linked to the page that you wanted.
- Tip! make sure the pages you are linking too are spelled or capitalized correctly.
when you think your done type in something while in source mode, click preview and it should appear something like this:

preview of page after all progress
when your all done and making sure everythng is done correctly and such you can hit publish!
End of tutorial
Congrats! you did it! now you can add whatever you like to your page(s)! make them awesome!
Gallery
")
")
")
")
")
")
")
")
")
")
")
")
")
")
")
")